Notes on building a deep learning PC

When it comes to using GPUs for deep learning, I usually use Google Colab (80% of the time) or for when I need something more persistent, Google's Compute Engine running a deep learning virtual machine (VM). Colab usually suffices for short-to-medium size experiments but when you need to step things up, having a dedicated machine which doesn't timeout (Colab times out after some unknown period of time) is paramount.
Usually Google's Compute Engine suffices for my larger experiments too but after a few times being shut out from using GPUs since there were none available in my region (australia-southeast), I got fed up.
I'd been thinking about building my own deep learning PC for a while. Partly for fun and partly to have a GPU-powered machine available locally whenever I wanted. So after being unable to use GPUs on Google's Cloud Platform (GCP) for two days in a row, I decided to get into the weeds of researching what it would actually take to build one.
I'd never built a PC before and when I started researching, I was intimidated by the amount of choices that are out there.
But like anything, the deeper you get into it, the more interesting it gets.
This post is not a guide to building your own as much as it is a collation of the resources I used to build mine. In saying that, you might find some of them useful.
Do you need to build your own deep learning PC?
If you're just beginning: no. If you're experienced: maybe.
One of the most common questions I get is "what is the best computer for machine learning?".
There is no "best". If you're just getting started, buy the computer you can afford or use the computer you already have and write lots of code. If your computer doesn't have a GPU, use Google Colab.
I've been working with machine learning and deep learning for three years and I'd argue I still don't even need my own deep learning PC.
If your needs exceed what Google Colab can offer, cloud resources from GCP, Amazon Web Services and Azure are plentiful. But if you find yourself spending far too much on cloud resources, you might want to invest in building your own deep learning PC and save yourself in the long-run.
For a more comprehensive cost breakdown on this type of scenario read Jeff Chen's great series of articles:
- Why building your own deep learning computer is 10x cheaper than AWS
- How to build the perfect deep learning computer and save thousands of dollars
Hardware
Note: On 1 September 2020, Nvidia announced its latest 30 series GPUs and they've rendered all of the GPU-specific resources in this article obsolete. So if you're reading this after September 2020, pay attention to everything except the choice of GPU, because for that, you're going to want to buy a 3070, 3080 or 3090. Or if these are still out of your price range, be on the lookout for discounted, older, but still working GPUs such as 1080, 2070 or 2080.
Update (22 October 2020): Tim Dettmers has updated his post Which GPU for Deep Learning to reflect all of the latest Nvidia 30 series chips. For a fantastic in-depth guide on what GPU hardware you should use, read Tim's post.
After a couple of weeks of research, in other words, rereading some great articles from Tim Dettmers and Jeff Chen half a dozen times each, I finally collated a list of hardware parts I thought might work together.
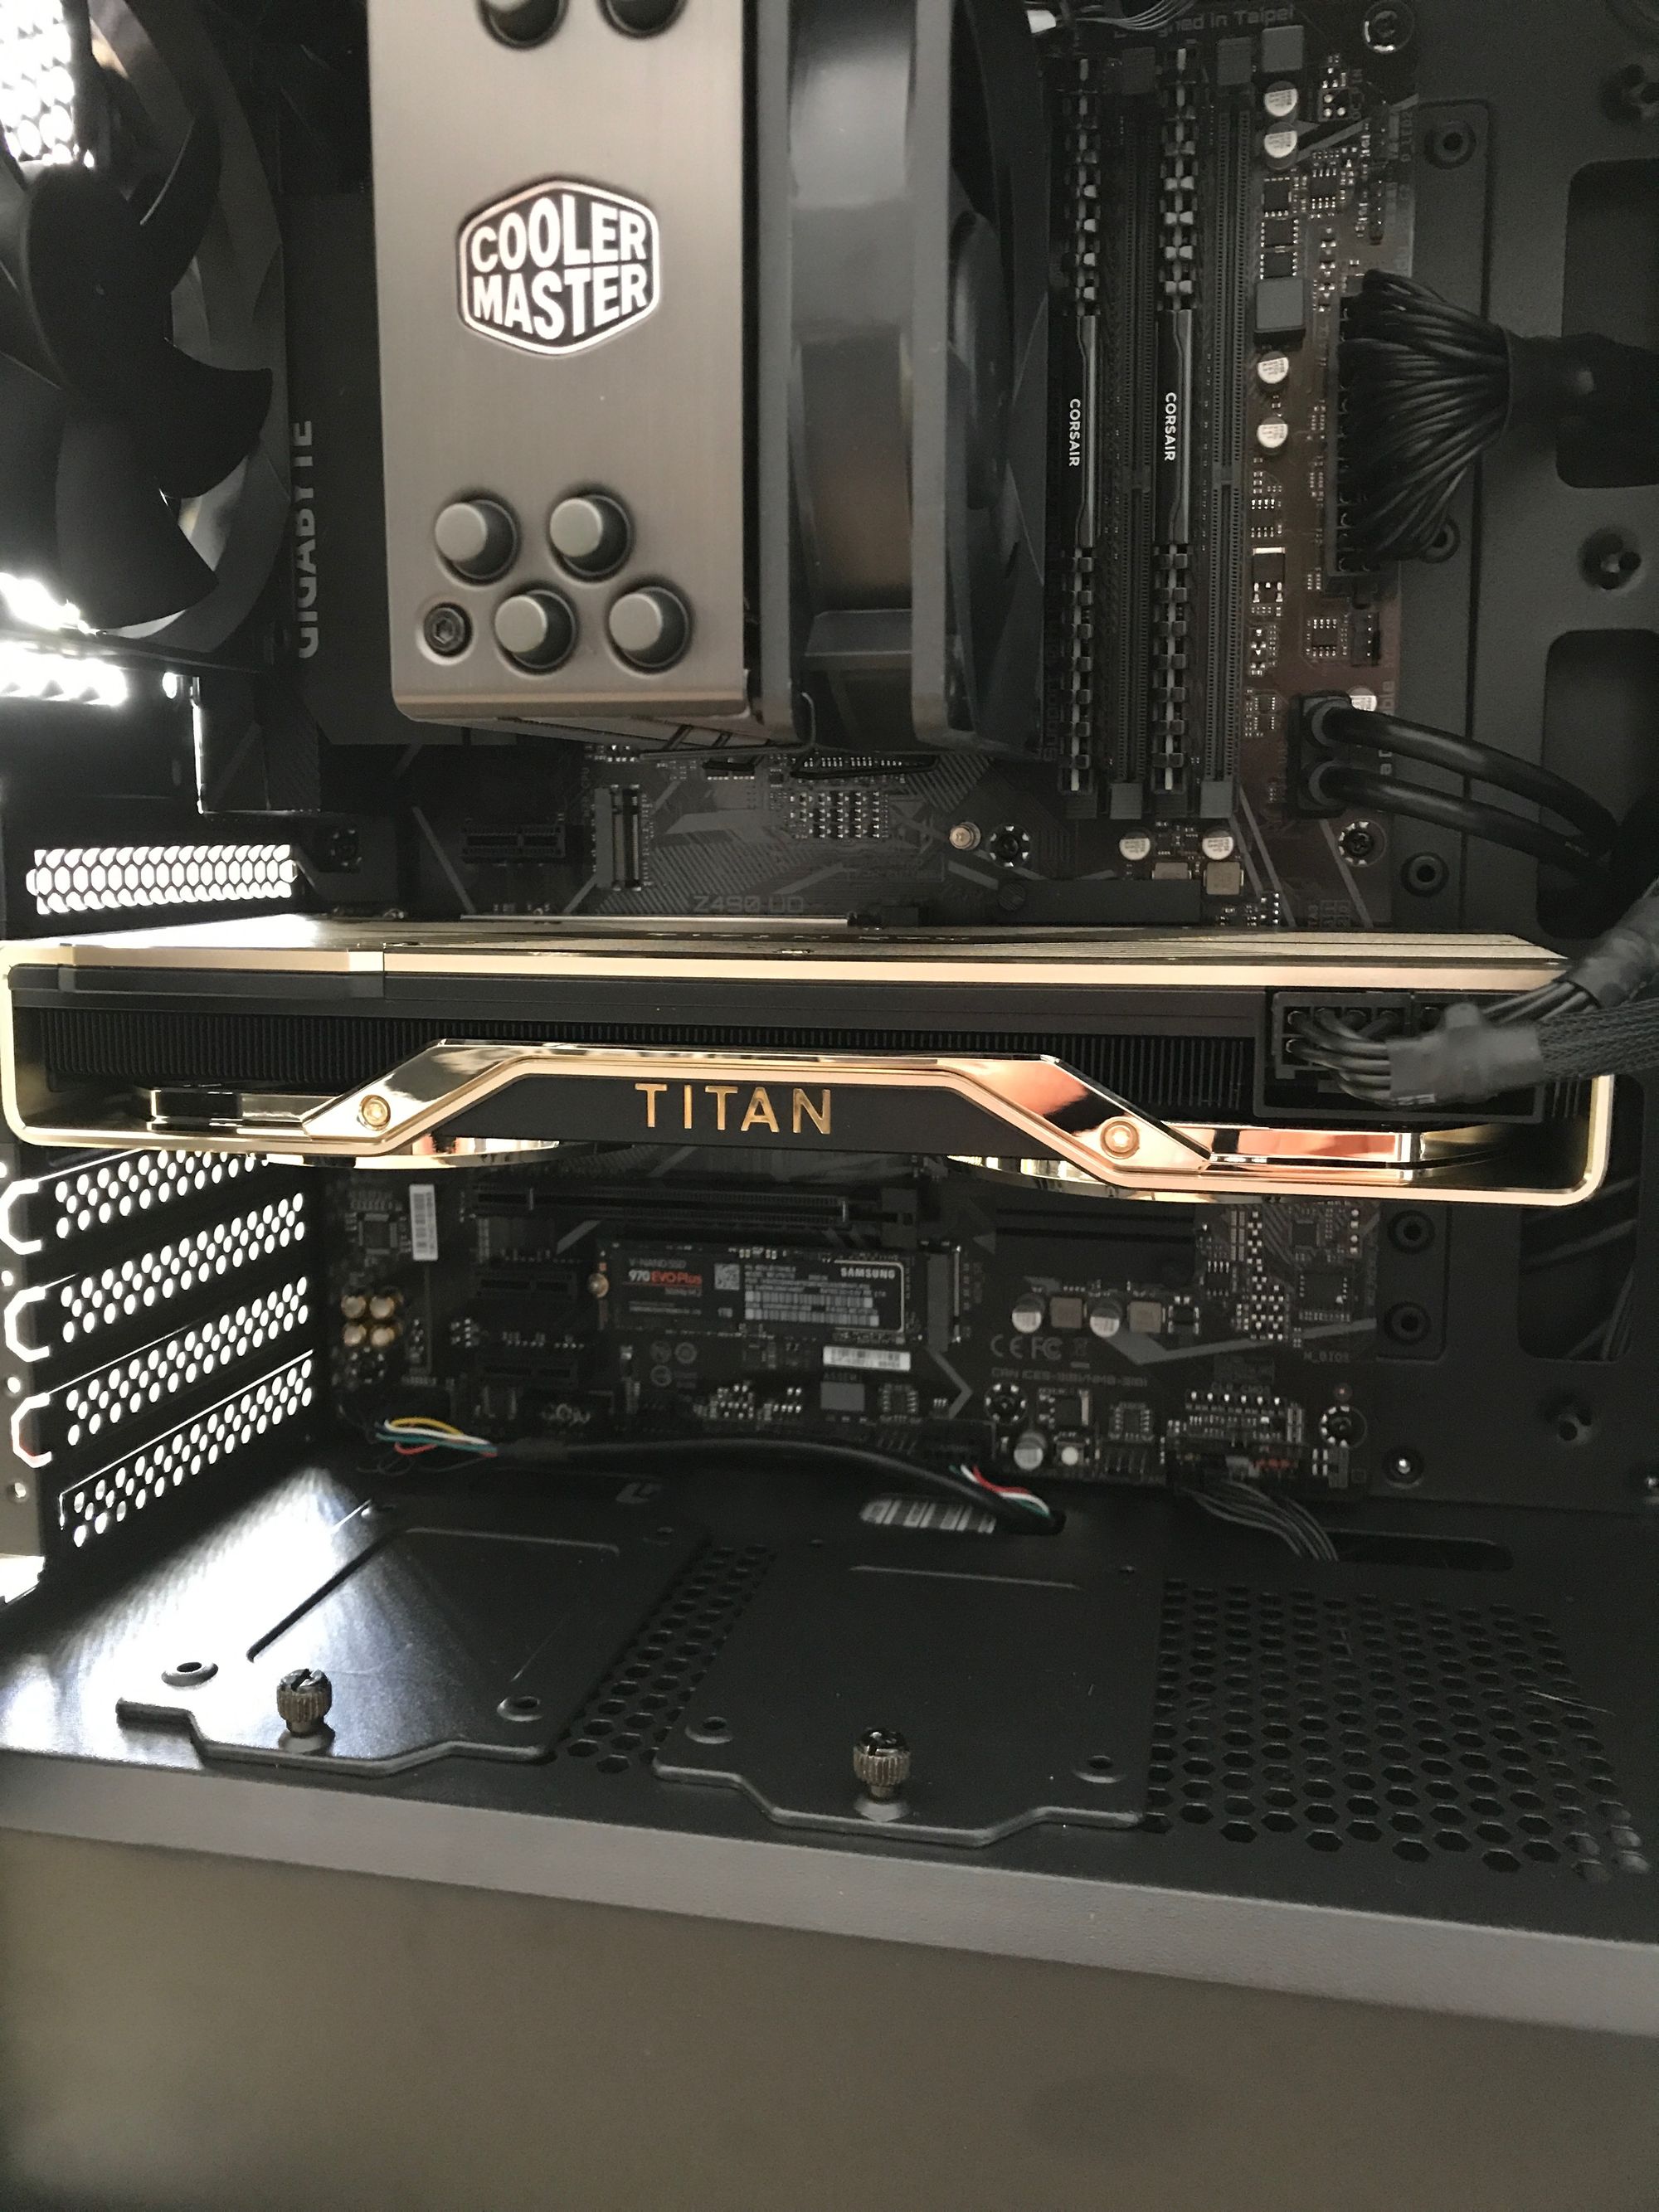
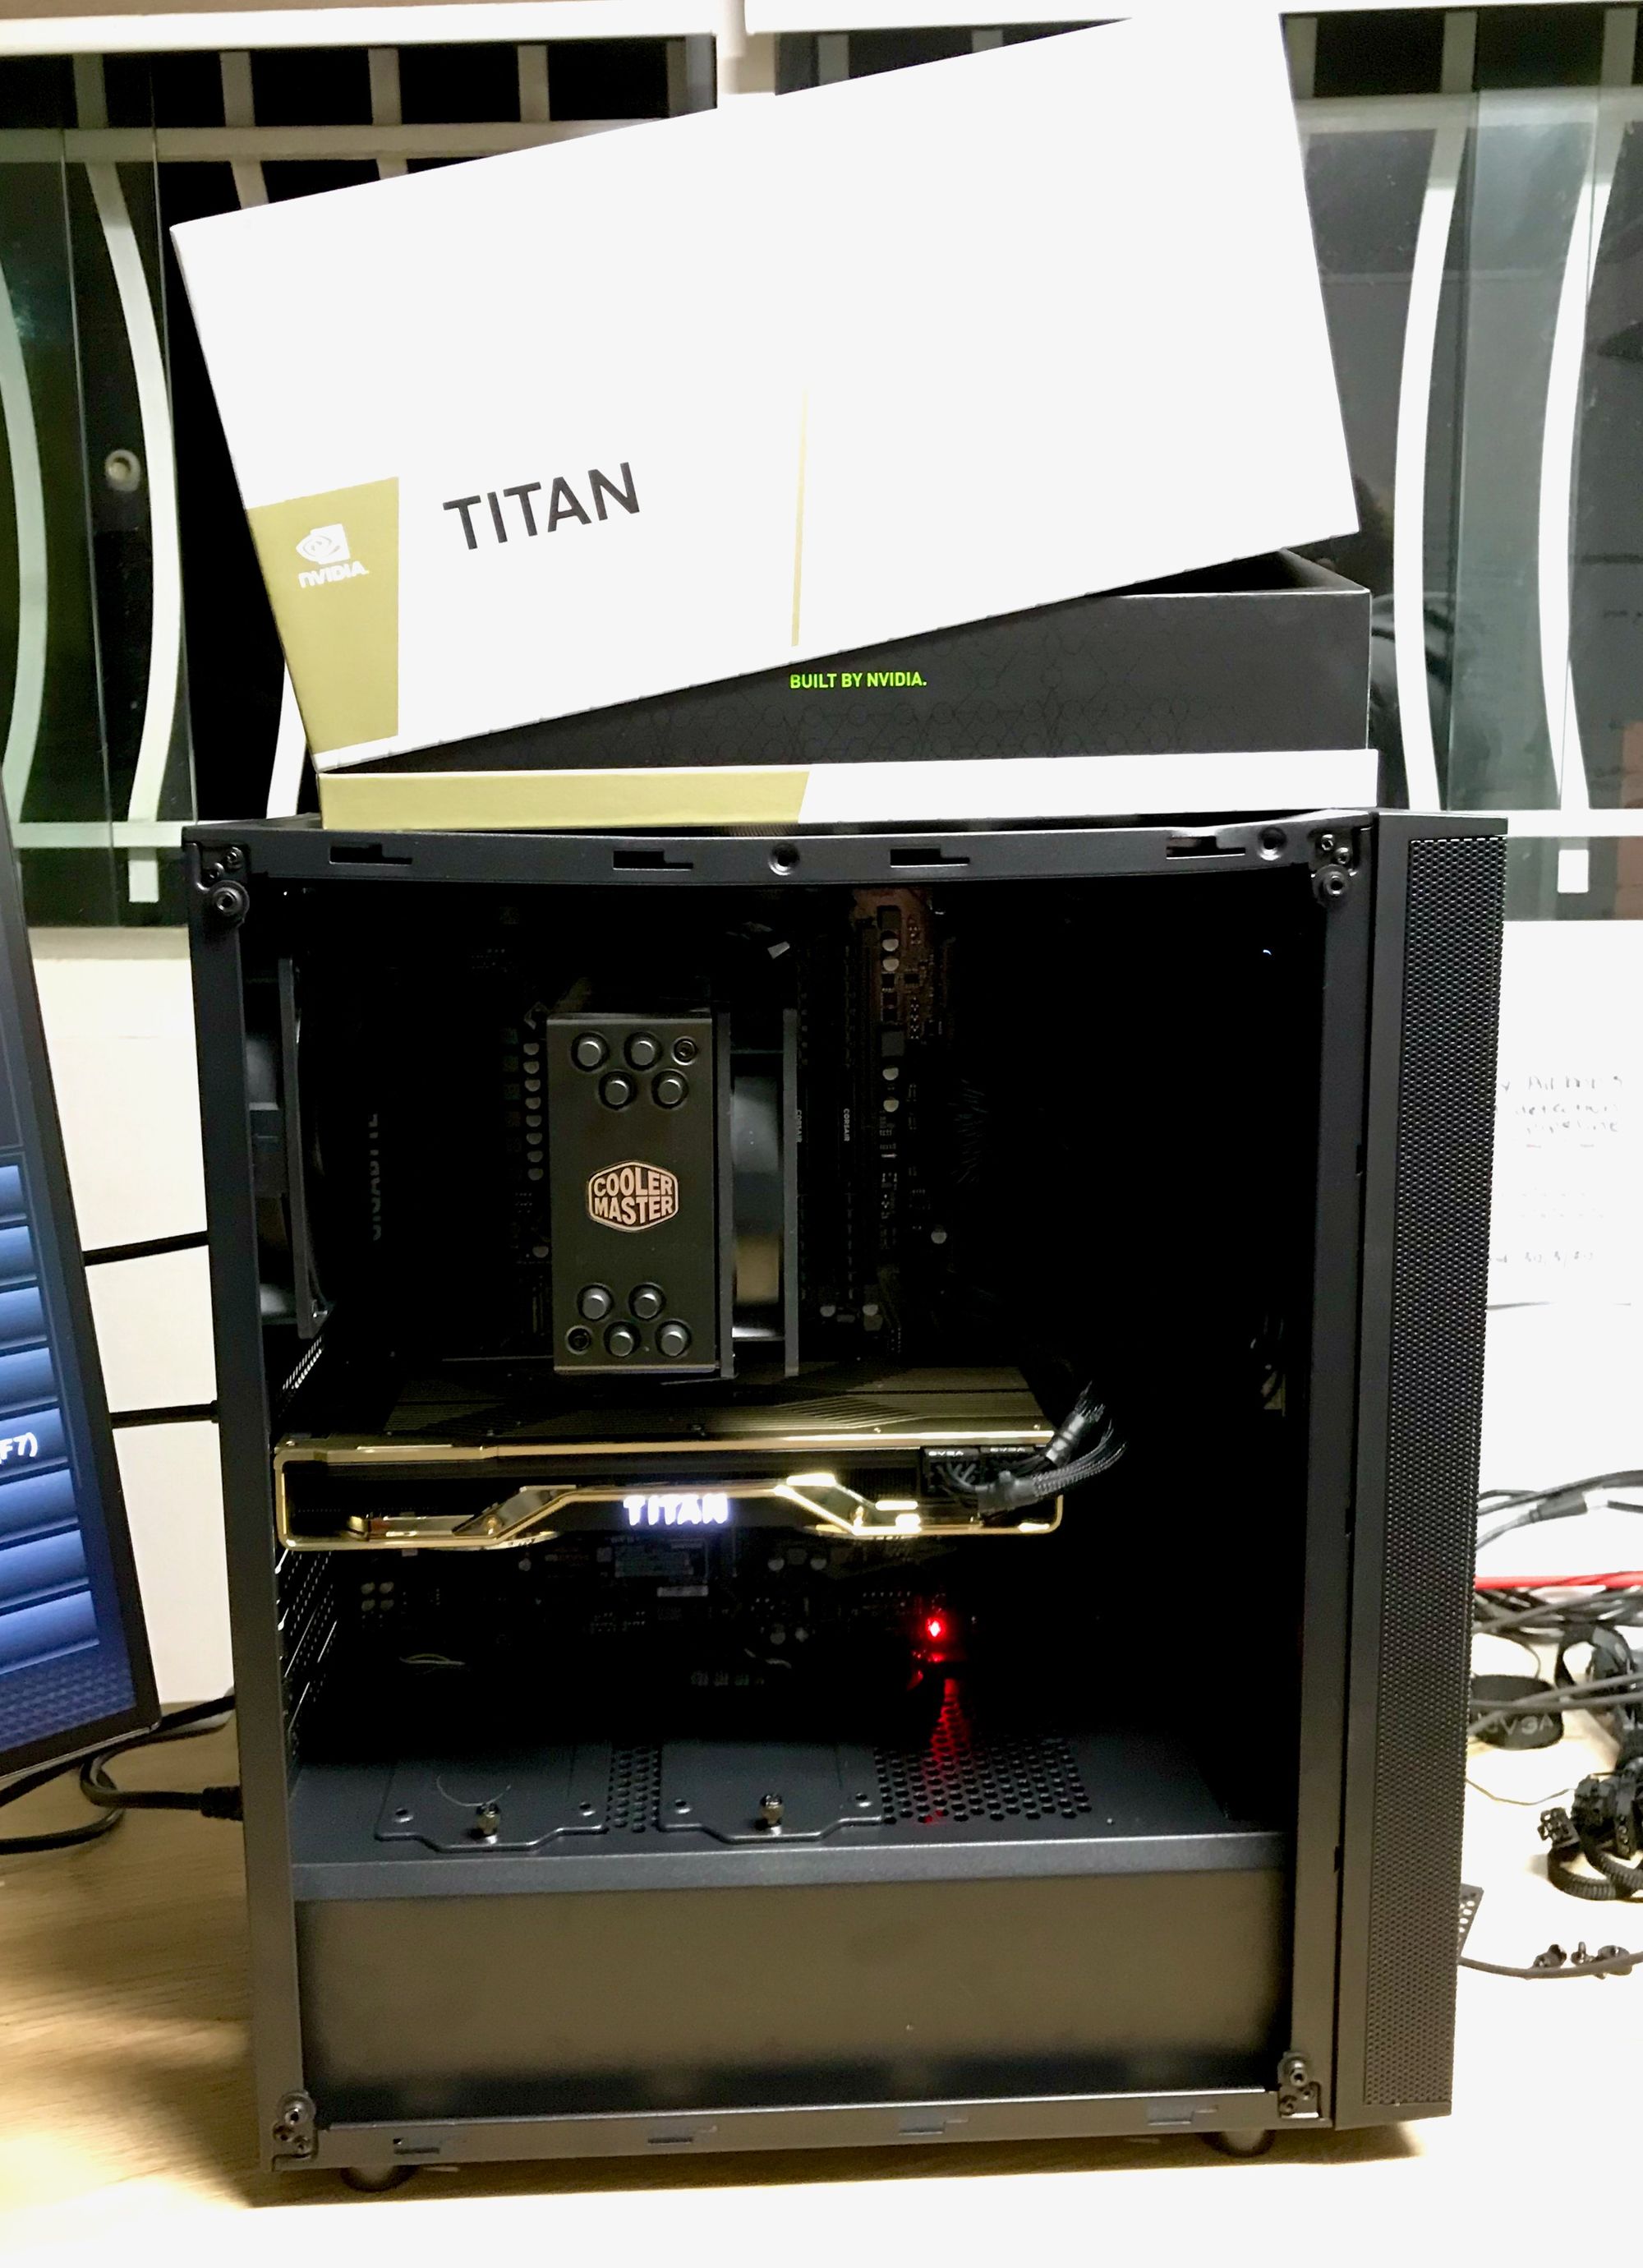
The one criteria I had was all of the parts had to be compatible with the TITAN RTX GPU Nvidia so kindly offered to send me.
More specifically, to figure out what I needed, I went through the following steps:
- Read Tim Dettmers' article A Full Hardware Guide to Deep Learning to figure out how different PC parts interact with each other in a deep learning learning machine. E.g. what kind of CPU do you need to partner with your GPU?
- Read Tim Dettmers' article Which GPU for Deep Learning? to figure out which GPU would suit my needs. Before Nvidia decided to send me a TITAN RTX, I decided to purchase the 2080 TI because of its 11GB of VRAM (memory). Tim's article talks more about memory needs. This choice was before Nvidia's 30 series was announced, if I was going to purchase one now it'd be the 3080 or 3090. Note: As of writing, Tim's article doesn't include the 30 series GPUs, however, the information in the article is still very valid.
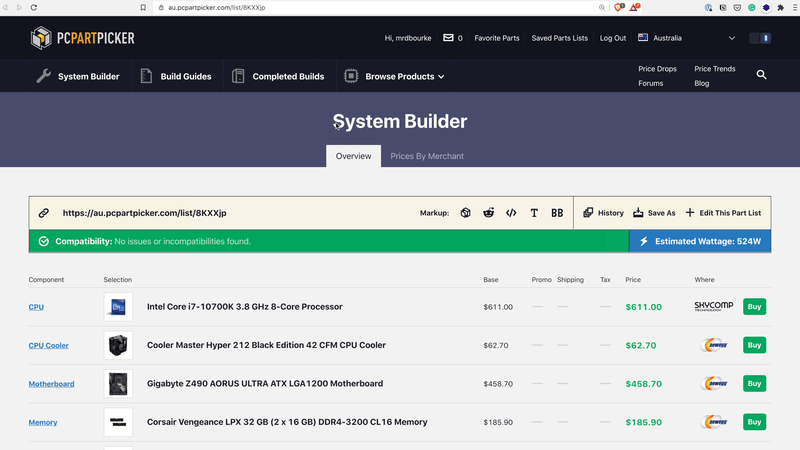
- Used PCPartPicker to put together a list of computer parts for my build. After reading the above two articles, I had an idea of what parts I'd need. Picking PC parts can be pretty daunting but PCPartPicker makes it easy to tell whether or not the parts you're after work together.
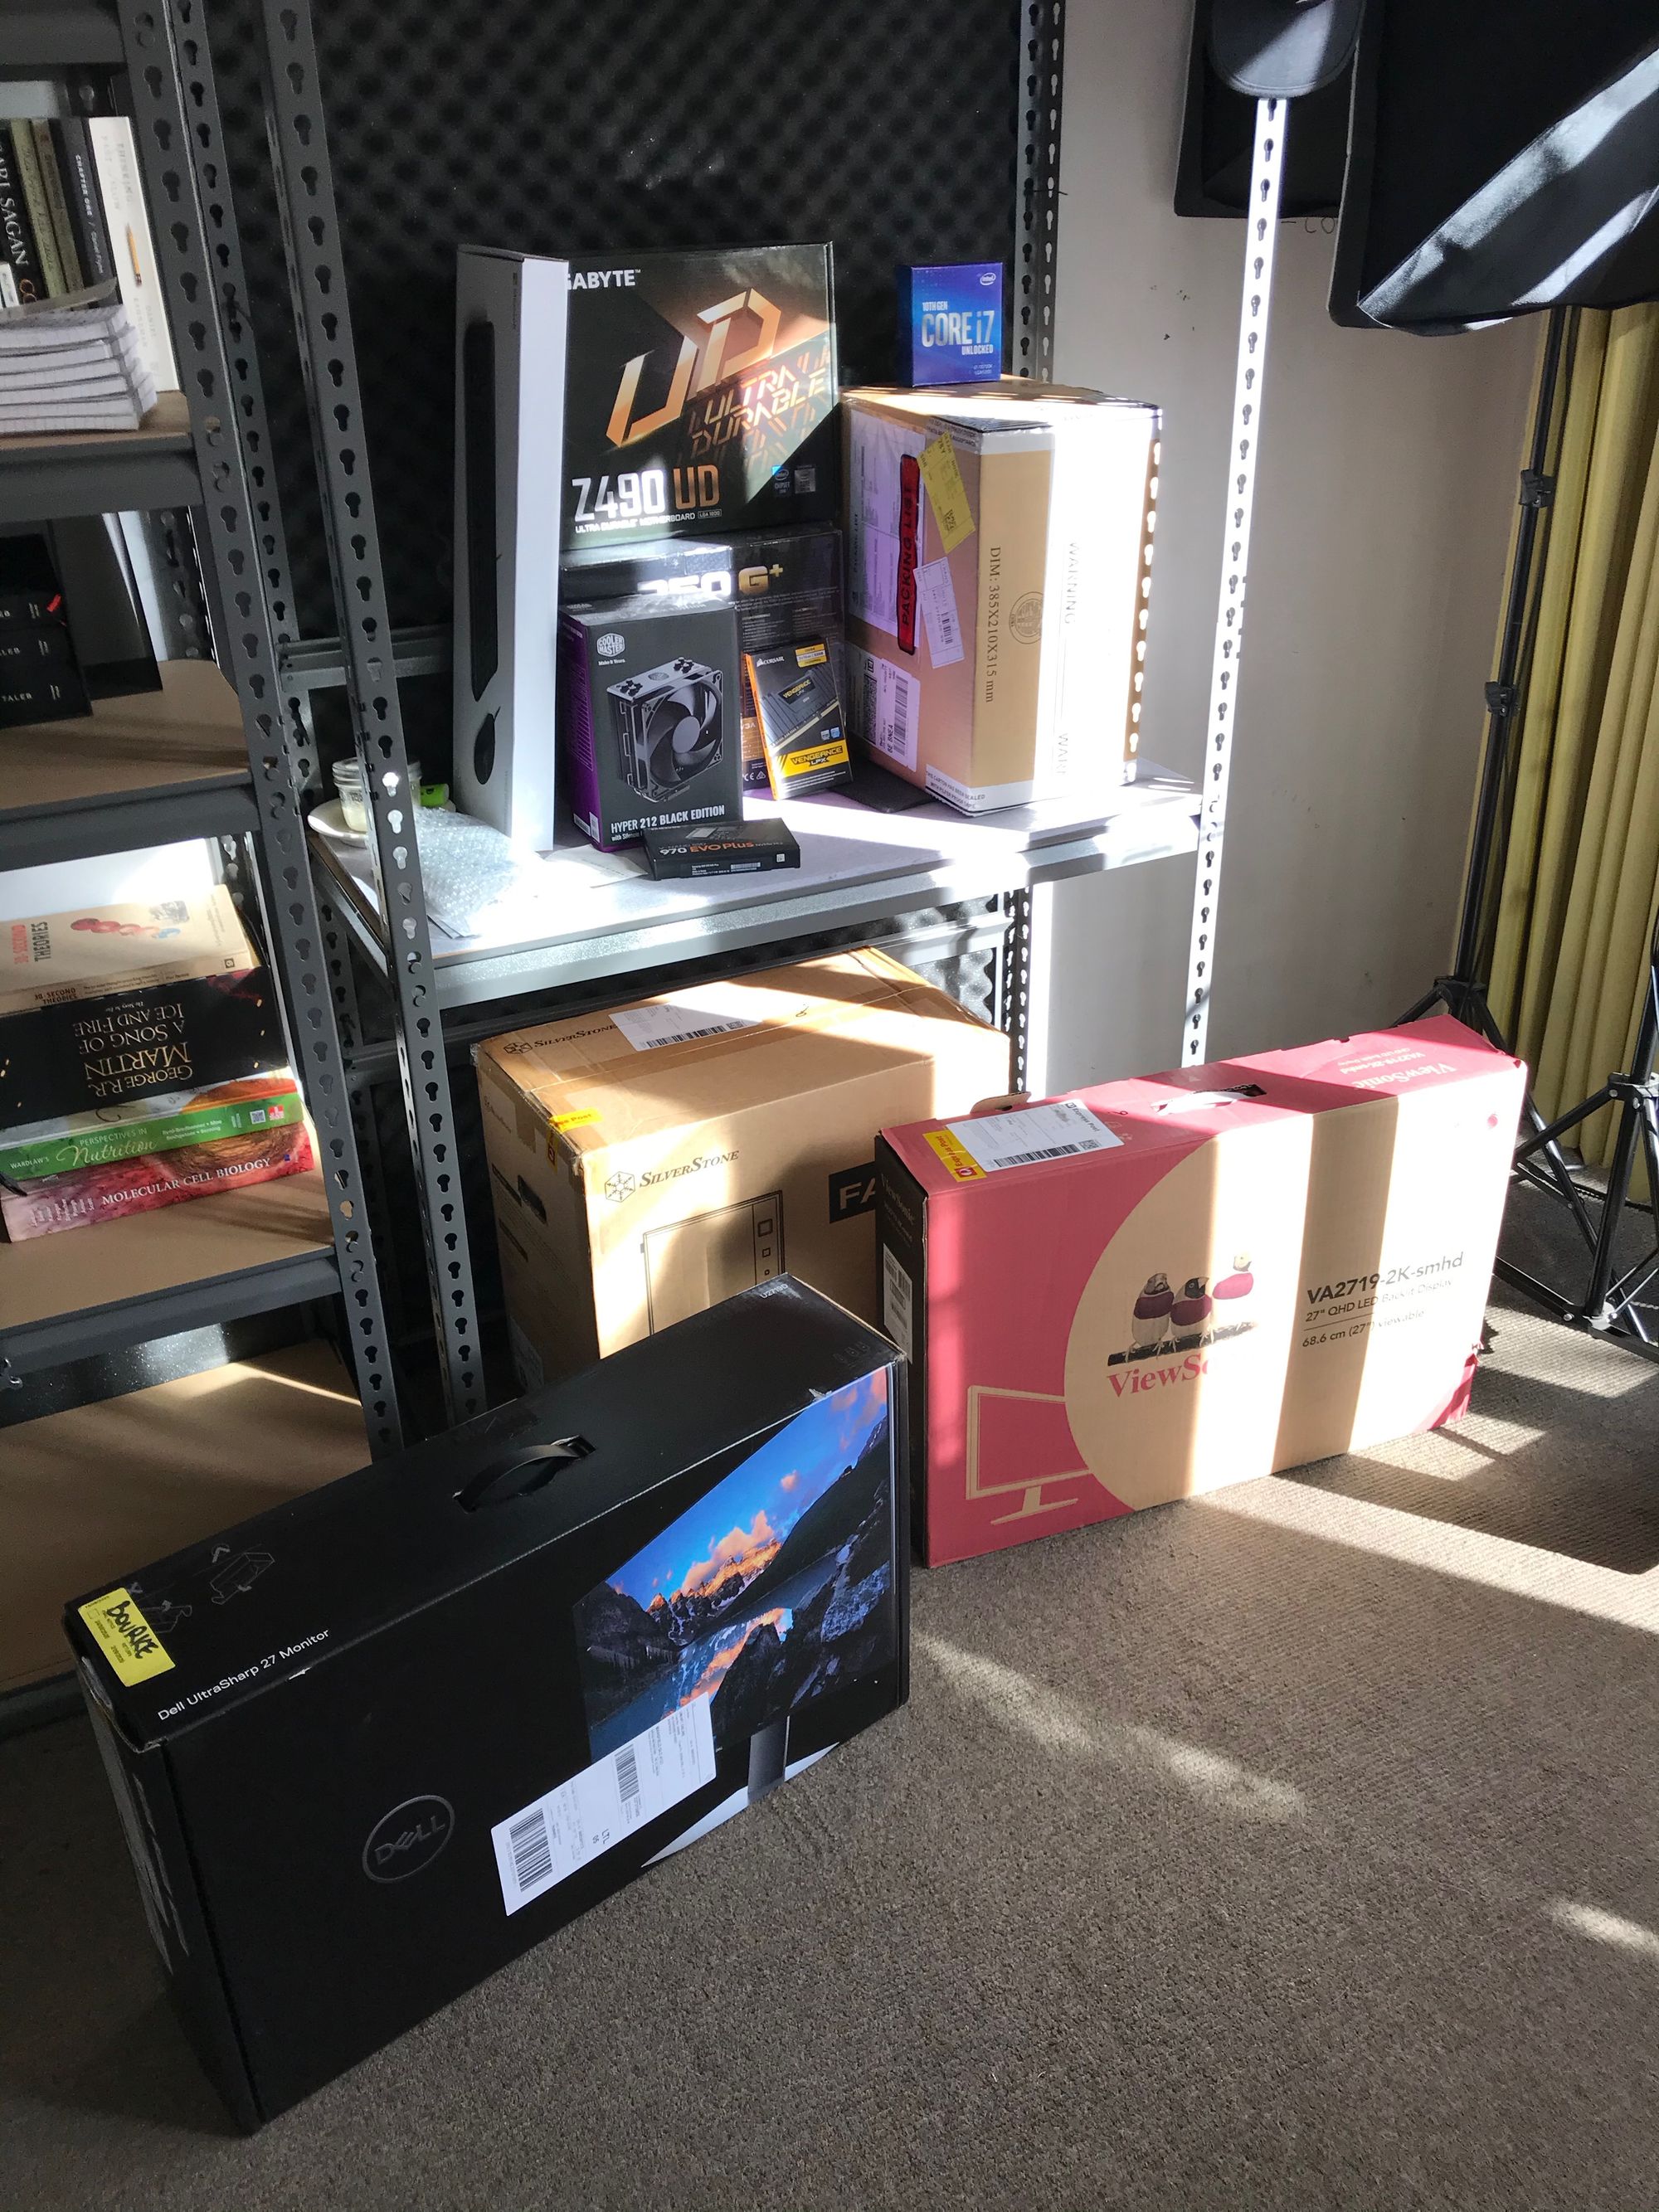
The specific parts I used for my PC are below:
- CPU – Intel Core i7-10700K 3.8 GHz 8-Core Processor
- CPU Cooler – Cooler Master Hyper 212 Black Edition 42 CFM CPU Cooler
- Motherboard – Gigabyte Z490 AORUS ULTRA ATX LGA1200 Motherboard
Make sure the motherboard can fit your CPU. For example, there are AMD (a brand of CPU) and Intel specific motherboards. Since I have an Intel CPU, I needed an Intel-compatible motherboard.
The general rule of thumb is you want as much RAM as you have VRAM (video RAM). For example, if your GPU card has 24GB of memory, you'll want at least 24GB of CPU RAM.
- Storage (bootable) – Samsung 970 Evo 1 TB M.2-2280 NVME Solid State Drive
It's 2020, you'll want to be booting off and using flash storage (also called solid-state drives or SSDs) to boot off. They're much faster than disk drives.
- Storage (extra) — Seagate Barracuda Internal Hard Drive 3TB
For storing extra data you won't access very often, regular spinning disk hard drives still work great.
- Video card (GPU) — NVIDIA TITAN RTX 24GB Video Card
- Case — Silverstone FARA R1 ATX Mid Tower Case
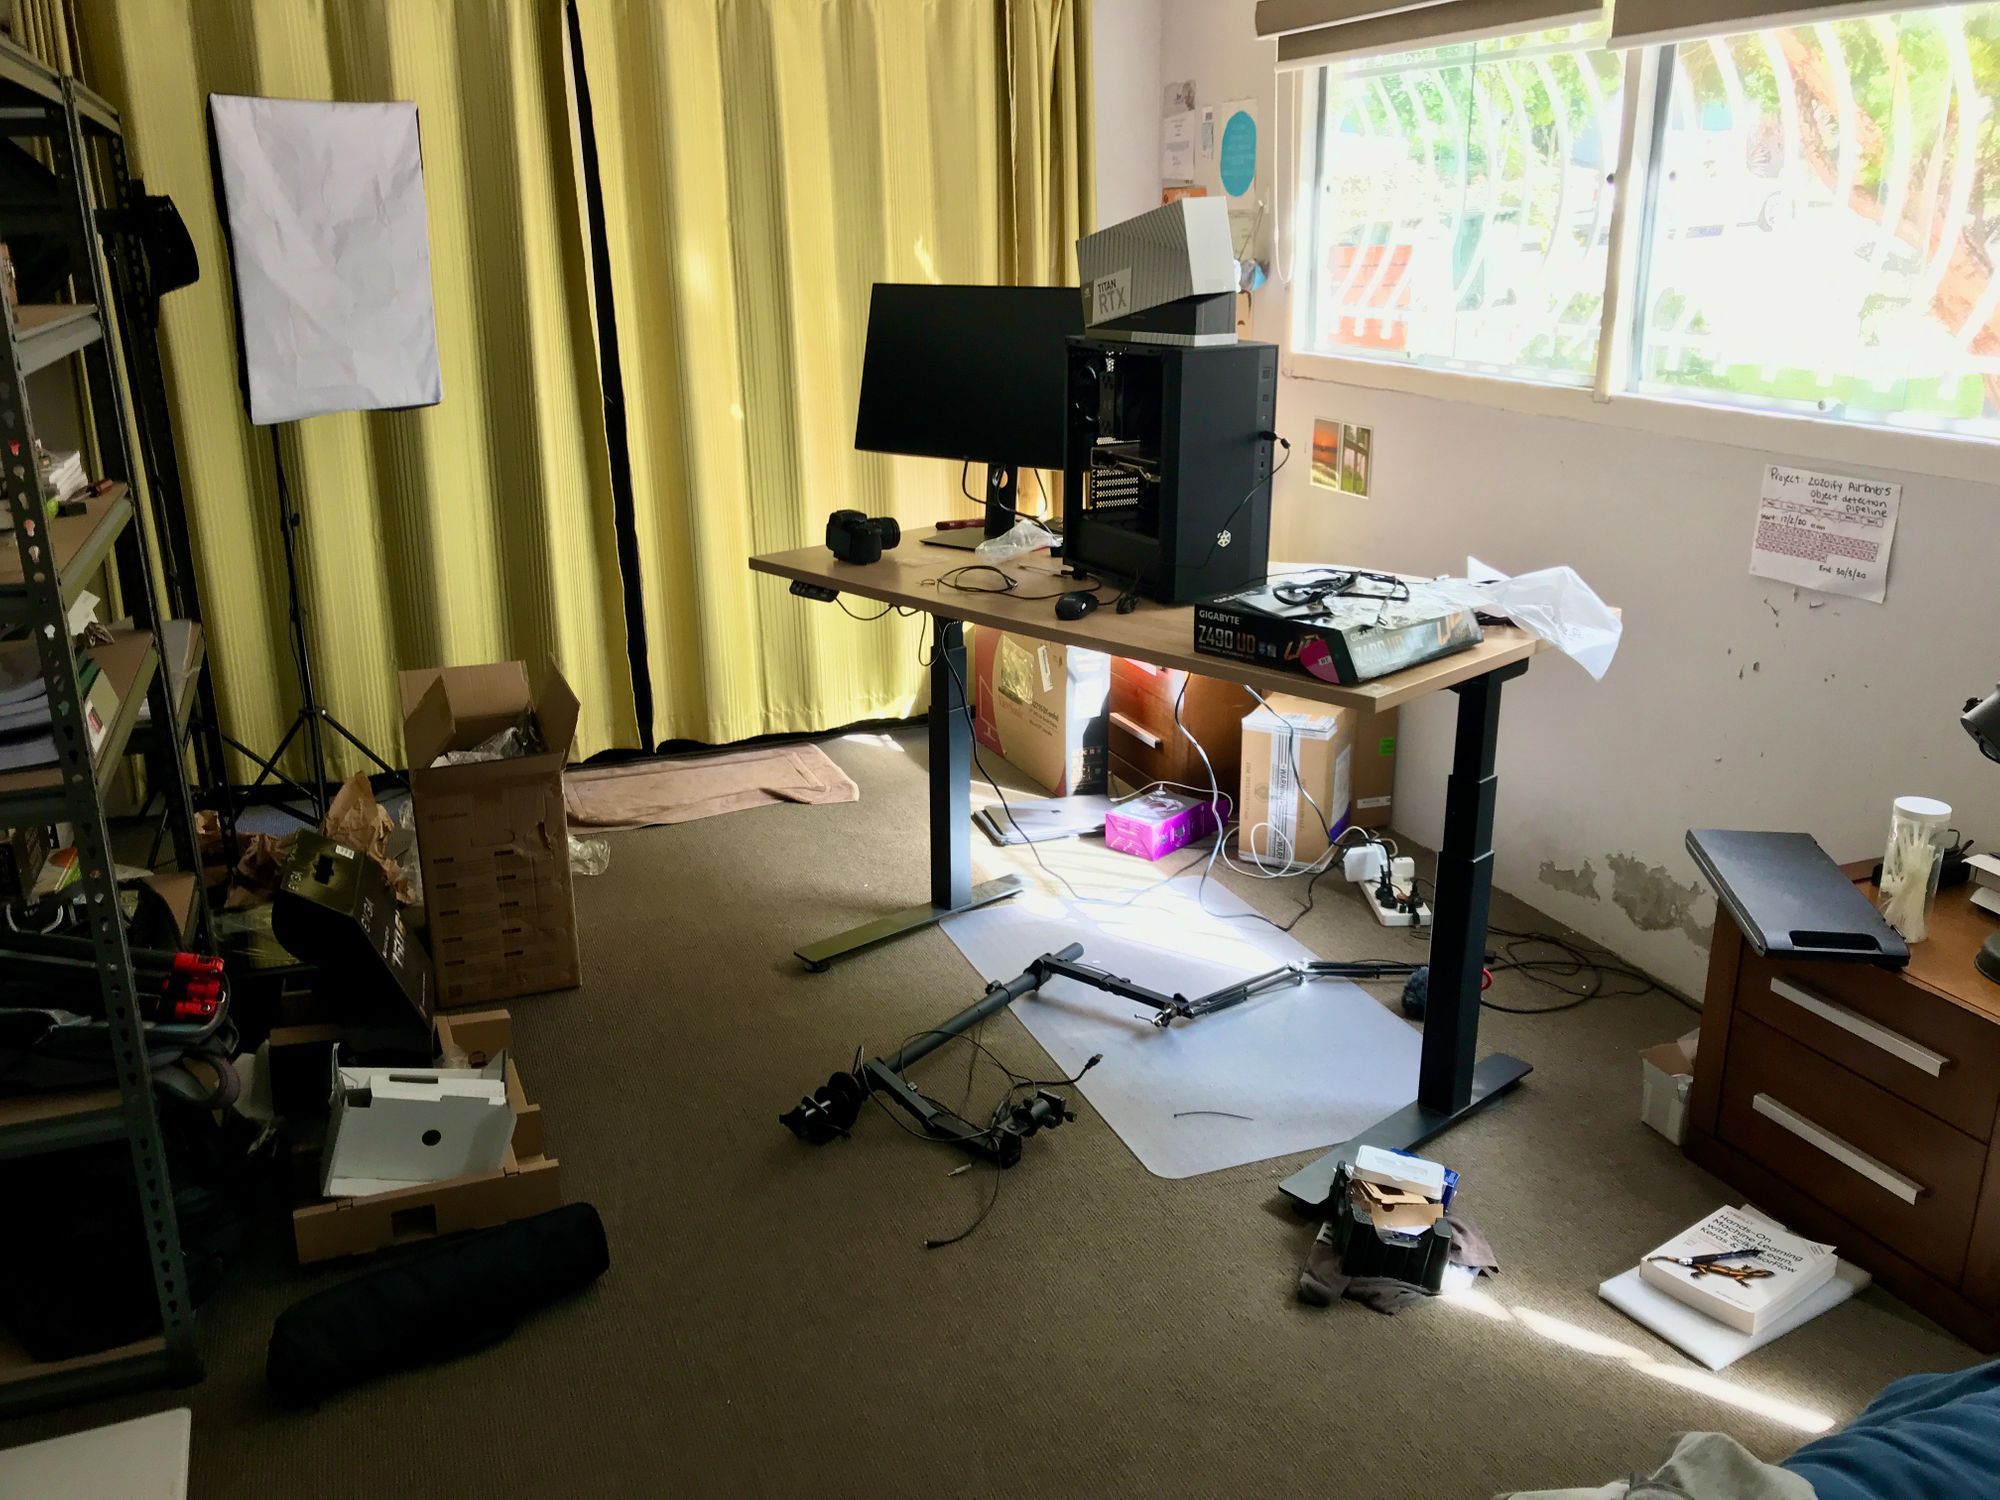
As you'll see in the build video, this came with dents in it and is hence how my deep learning PC earned the name Denty.
Make sure your case can hold the GPU you're using. If you plan on installing multiple GPUs (2+), you'll want a full tower case (not mid).
You'll want enough power for all of your parts. For one GPU, 750W is plenty. But for multiple GPUs, you'll probably want more.
Each of the above parts usually list how much power they consume. So to figure out your power supply you can add them up and see what the total comes out to.
I'm used to the Retina display on the MacBook Pro so I needed a high quality screen. And although this still isn't as good as the Retina display, it's a beautiful screen.
If your computer is specifically going to be for deep learning, I'd pick the GPU(s) you're going to use first (using the Which GPU for Deep Learning? article and taking into account Nvidia's 30 series GPUs) and then build around it/them.
Putting it together
My original plan was to set aside a day (or three) to watch YouTube videos on how to piece together a PC and hopefully connect the parts I'd ordered without breaking them.
But as it turns out, my good friend Michael used to build PCs on the daily. So when I told him I was building one and he offered to help, I jumped at the offer. Thank you Michael!
So I don't have any good resources on actually putting the parts together but a quick YouTube search on "How to put together a PC" results in the following videos:
Piecing together the hardware of my PC took about four banter-filled hours.
Software
Once you've got your deep learning PC box put together and it's powering on, the first thing you'll want to do is install an operating system (OS). The main two choices you've got here are Linux or Windows. Of course, there are more but you'll save yourself lots of pain choosing one of these.
Operating system
I chose Linux, specifically the latest version of Ubuntu (20.04 at the time of writing).
To install Ubuntu, I went through the following steps:
- Created a bootable USB drive (you'll need a blank USB for this) using the Ubuntu guide for macOS, there's also a guide for Windows. This bootable USB drive is used to load the Ubuntu OS onto your new machine.
- Plugged the bootable USB drive into the new deep learning PC and booted the new PC off of it. This should happen automatically, but if it doesn't, you can try pressing a key like F12. After booting off the USB drive, I followed through with the Ubuntu desktop installation guide.
Creating a developer environment
After having a running installation of Ubuntu, I installed Miniconda to be able to use Conda to create developer environments.
To do so, I followed the Miniconda for Linux installation guide then created a test environment:
- Downloaded and installed Miniconda for Linux.
- Created a test environment to see if things were working:
mkdir test_dev
cd test_dev
conda create --prefix ./env pandas numpy matplotlib jupyter
conda activate ./env
jupyter notebook
The main test here being whether or not I could run a Jupyter Notebook on my new machine.
Installing Nvidia drivers (CUDA + cuDNN)
This was probably the most tricky part of the whole build. It's actually fairly straightforward but in my case, there were a few gotchas along the way, which usually came in the form of me missing a step in the installation guides.
I'd love to put down a succinct list of steps you could take here, but really, as you'll probably find out, despite how detailed the guides are, you'll probably run into a roadblock of some kind.
None the less, the following resources are what I used to install the required Nvidia drivers, CUDA and cuDNN, to be able to fulfil my final goal of the build: get TensorFlow running on the GPU.
Note: There is an official TensorFlow guide to getting TensorFlow running on the GPU, however, at the time of writing it is for Ubuntu 18.04 and the CUDA versions associated with it. Since I installed Ubuntu 20.04, I kind of figured things out as I went.
To get TensorFlow running on the GPU, I went through the following resources:
- Read through and followed Installing TensorFlow with CUDA and cuDNN GPU support on Ubuntu 20.04 by Rohan Paul. This is a compilation of many of the following resources. According to the author, following it through should result in TensorFlow running on your Nvidia GPU. But I had to dig through a couple of the following when errors arose (again, this probably my fault, not the guides).
- Followed along with the Nvidia guide to install CUDA 11.0 on Ubuntu 20.04.
- Downloaded Nvidia cuDNN from the cuDNN download page (requires a Nvidia developer account).
- After downloading cuDNN, I followed Nvidia's guide for installing cuDNN on Linux.
- Read through a helpful thread on installing CUDA and cuDNN thread on askubuntu.
Again, I'd love for the above to be more straightforward but the truth is, I really did spend a few hours going between the various resources making sure I had everything setup.
The main check to seeing whether or not everything was running was installing TensorFlow (pip install TensorFlow) into my current environment, then running the following commands in a Jupyter Notebook.
To check the details of your GPU:
!nvidia-smi
Should output something like:
Sun Sep  6 14:56:55 2020
+-----------------------------------------------------------------------------+
| NVIDIA-SMI 450.51.06    Driver Version: 450.51.06    CUDA Version: 11.0     |
|-------------------------------+----------------------+----------------------+
| GPU  Name        Persistence-M| Bus-Id        Disp.A | Volatile Uncorr. ECC |
| Fan  Temp  Perf  Pwr:Usage/Cap|         Memory-Usage | GPU-Util  Compute M. |
|                               |                      |               MIG M. |
|===============================+======================+======================|
|   0  TITAN RTX           On   | 00000000:01:00.0  On |                  N/A |
| 41%   29C    P8    10W / 280W |    400MiB / 24220MiB |     12%      Default |
|                               |                      |                  N/A |
+-------------------------------+----------------------+----------------------+

+-----------------------------------------------------------------------------+
| Processes:                                                                  |
|  GPU   GI   CI        PID   Type   Process name                  GPU Memory |
|        ID   ID                                                   Usage      |
|=============================================================================|
|    0   N/A  N/A      1077      G   /usr/lib/xorg/Xorg                 53MiB |
|    0   N/A  N/A      2039      G   /usr/lib/xorg/Xorg                112MiB |
|    0   N/A  N/A      2239      G   /usr/bin/gnome-shell              220MiB |
+-----------------------------------------------------------------------------+
To see if TensorFlow is picking your GPU:
import tensorflow as tf
tf.config.list_physical_devices('GPU')
Should output something like:
[PhysicalDevice(name='/physical_device:GPU:0', device_type='GPU')]Along with the above, you can also see if TensorFlow was built with CUDA (required to be able to run code on your GPU):
tf.test.is_built_with_cuda()
>>> True if 'yes' # if everything worked, it should output this
>>> False if 'no'
Getting stuck
Two pieces of advice I can for when you get stuck or something feels like it isn't working.
- Try restarting your machine – I spent 20-minutes trying to figure out something I did wrong, turns out, I didn't do anything wrong but for the software to finish installing, I needed to restart my machine.
- If you're facing an issue, chances are, someone else has too – never fear, you know how to use the internet and how to ask questions. A quick search and you'll probably find a thread somewhere where someone has ran into the same problem you are and a bunch of helpful people have offered their advice. If such a thread doesn't exist, ask for help.
A great example of number two is a helpful GitHub thread I stumbled across when facing and error along the lines of:
ImportError: libcudnn.so.7: cannot open shared object file: No such file or directory
The GitHub thread was filled with helpful tips along with a very succinct answer for creating a new Conda environment with TensorFlow and the required CUDA drivers.
Actually using the thing
It's been a few days since putting it together but I haven't quite yet worked out a proper workflow.
Since I use a MacBook Pro as my daily driver, I figured it might be overkill going between two full computer setups.
So my current thoughts are to connect to the deep learning PC via SSH. That way it'd be like connecting to a deep learning VM on the cloud, meaning I could still use one computer but have access to the hardware of another.
Someone on Twitter suggested the SSH extension within VSCode to get this kind of setup running. I haven't done this yet, but it looks like a very viable option.
In short, the workflow I'm thinking of would be:
- Continue to use MacBook Pro and Google Colab for smaller experiments.
- Run larger-scale experiments on deep learning PC when required via SSH.
- Store data locally (on the deep learning PC) for smaller datasets and on the cloud (Google Storage) for larger datasets.
Multiple GPUs
At this stage, I haven't yet being able to take proper advantage of the TITAN RTX and its 24GB of VRAM let alone think about using multiple GPUs.
The way I see it is until you're pushing a single GPU to its absolute limits, you don't need multiple GPUs. Plus, if your experiments are working well locally (on a single or small number of GPUs), scaling up to multiple GPUs on the cloud is easy.
Documenting the process
There's a build video which showcases many of the steps listed in this article, including actually unboxing and putting the PC together, installing an operating system and making sure TensorFlow is running on the GPU.
What started as a daunting task actually turned out to be a lot of fun. I used to not understand the obsession some people seem to have building their own computers, now I get it.
If you've got any questions about anything here or if I've missed something, let me know.